Working with Forms
Info: This article applies to Website Builder purchases made after 14th January 2025. For further assistance, please contact our support team.
In this article, you will learn how to work with embedded contact forms. You can add a contact form or create your own custom form on the page and then customize it to suit your needs.
Getting Started
To get started, you first need to log into the web builder through your Online Control Panel. Unsure how to do so? Follow our guide HERE
Step One
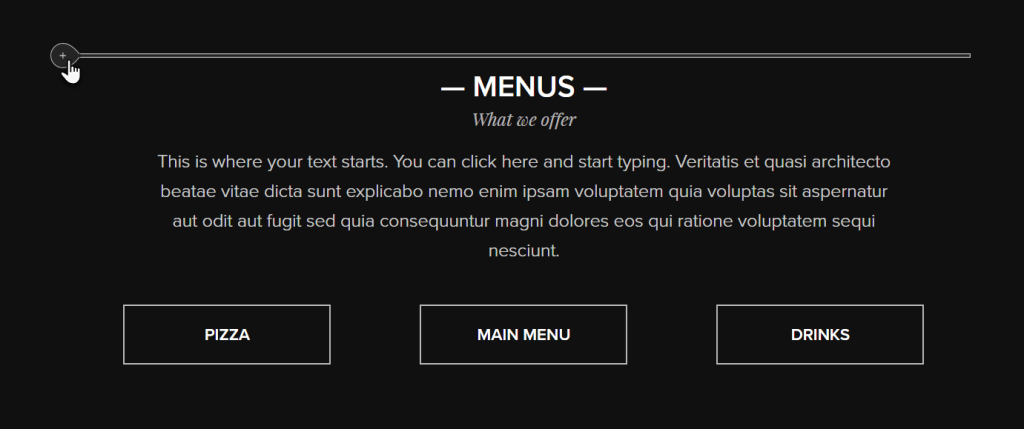
Position your mouse in the section so that the plus button for adding new content becomes visible.

Step Two
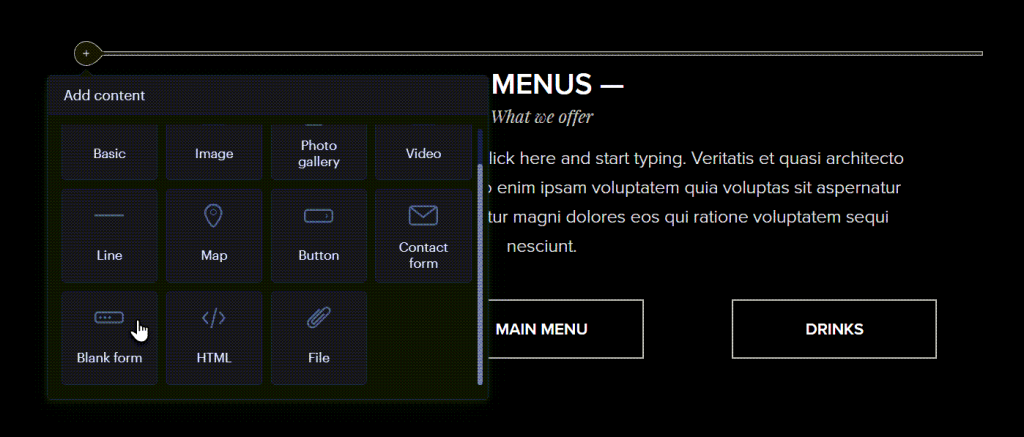
Click the plus button < Blank form.

Below, we will demonstrate how to work with the form.
Adding New Items
To add new fields, click the plus button to insert a new row.

Renaming Items
You can rename items by clicking on the item name.

Required Field
Click the item < Properties. Here, you can choose whether filling in this field will be required or not.

Form Submission Settings
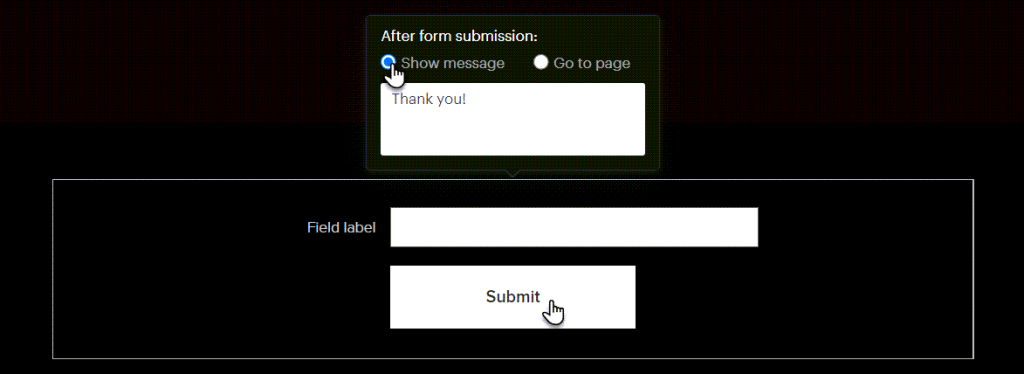
Click the form < Action after submitting, you will then be able to choose what happens after the form is submitted.

You can have the page display any text you choose after enabling the Show message option.

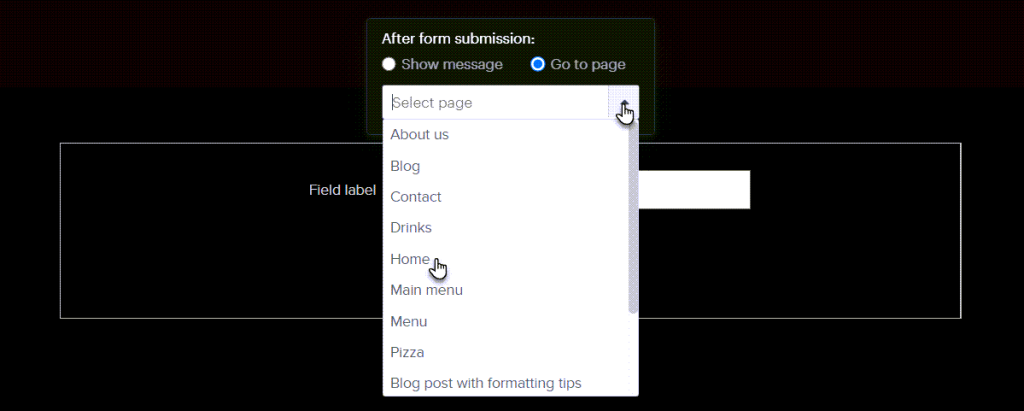
Another option is to redirect the visitor to another page on your website or to an external site. Check the Go to page option, then click the arrow to select the page where the visitor will be redirected. Alternatively, you can enter the address of an external website in the Select page field.

Click the Contact email button to enter the email address where you would like notifications of submitted forms to be sent.

You can adjust the option of where the text labels of individual fields will be displayed with the Text position button.

The Form protection button will redirect you to the administration page of the premium security service (if enabled in your package).

You can customize the button label by overriding the default Submit label. Additionally, you can choose the button’s appearance and display style according to your preferences.

Deleting Items
To delete any unwanted items, you can simply click onto the item, then click on the trash can icon.

If you have any further questions, simply raise a support request from within your Online Control Panel or call us on 01 5255768. Our Support team are here to help and ready to assist you with your enquiry.
For assistance raising a support request please follow the following guide.

