Protect your Plesk server through Fail2Ban (Brute Force Protection tool)
OS supported: Linux
Fail2Ban is a famous intrusion prevention software, that protects computer servers from brute-force attacks. The security tool has been implemented by Plesk for many years, however it was not installed by default on older versions. With the introduction of Plesk Obsidian, the most recent version at the time of this guide, Fail2Ban, has been installed by default.
If you have an older version of Plesk and do not want to upgrade (or cannot) to Plesk Obsidian, please check out our guide How to install Fail2Ban on a Plesk server.
However, it needs to be enabled to start protecting specific services (daemons) of your server, so please follow these steps to enable it:
Step 1
Log into Plesk via https://XXX.XXX.XXX.XXX:8443 , where the X’s represent the IP address of your server.
Step 2
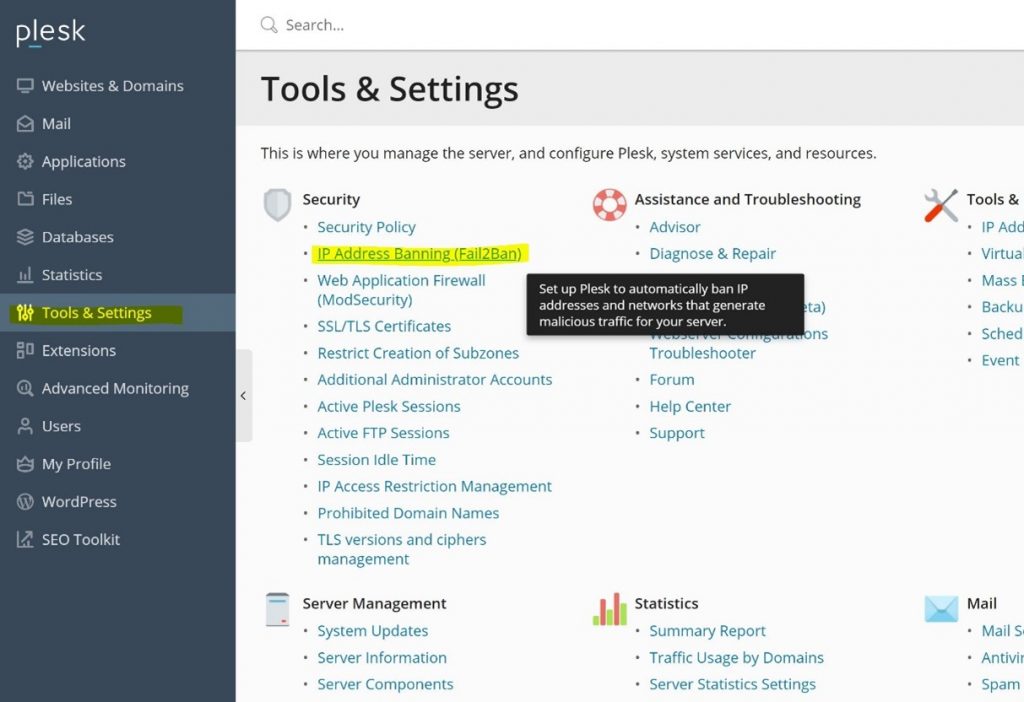
Click on “Tools & Settings” from the menu on the left-hand side.
Step 3
On the Security section, click on “IP Address Banning (Fail2Ban)” as shown in the pictures below.

Step 4
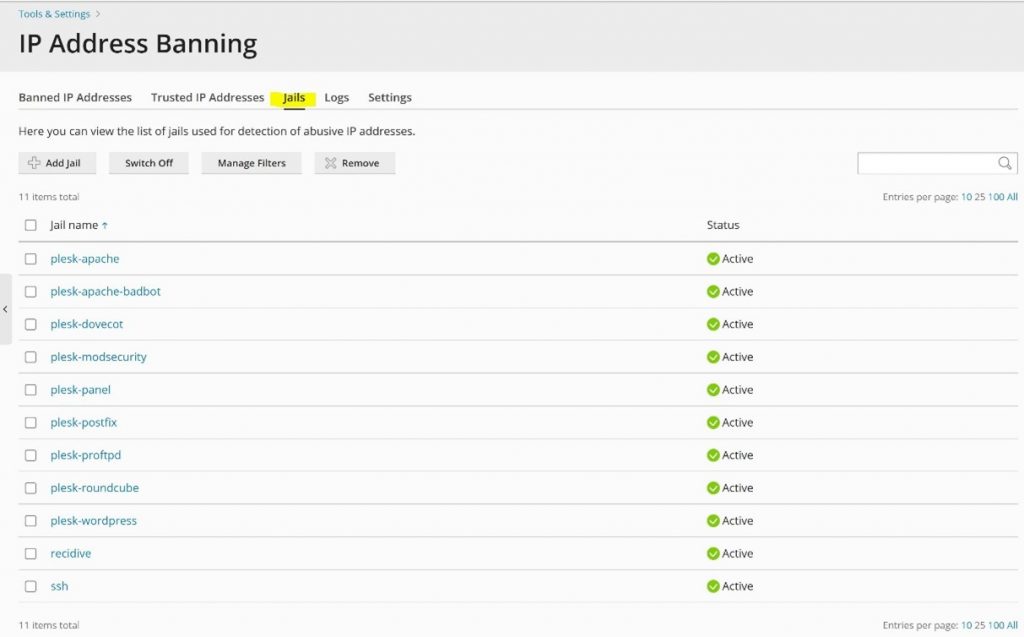
You may want to take a look at the Jails menu before enabling Fail2Ban. Through Fail2Ban Jails menu, you can configure Fail2Ban on whether to monitor a specific service or not, so you could disable one or more of them for instance.
For your reference, please look at the following screenshot:

Step 5
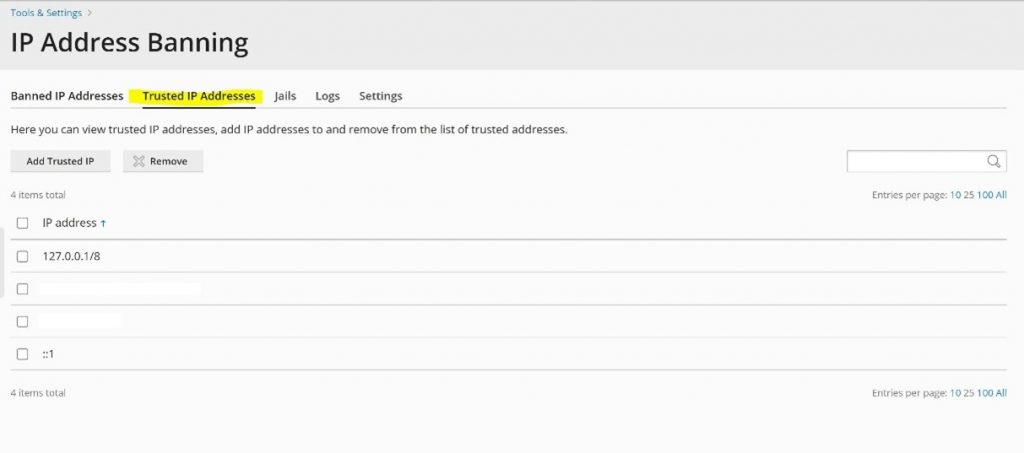
You may also want to add some IP addresses to the Trusted IP addresses list, so they will not be banned by Fail2Ban. This may be useful if some users of your network have a wrong credential set on their email client for example, so their IP address is likely to be blocked after a certain number of failed attempts to login.

Step 6
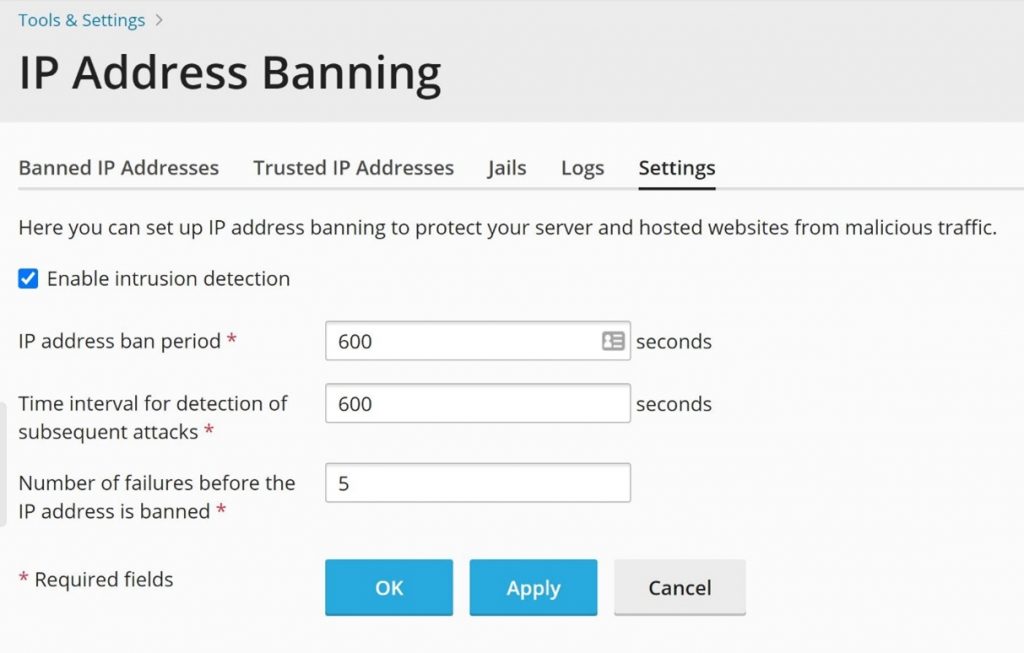
To enable Fail2Ban you just need to click on “Settings“, select “Enable intrusion detection“, and click on “OK“.
On the same page, it is also possible to customise some settings, such as ban period and the number of failures before the IP address is banned, as you can see on the following screenshot:

Step 7
To check on Fail2Ban activity, you may need to analyse its log file from time to time, which you can reach and download via the Plesk GUI.
You can see this in the screenshot below:


