How to Add a Spacing
Info: This article applies to Website Builder purchases made after 14th January 2025. For further assistance, please contact our support team.
In this article, you will learn how to add spacing to your project. This feature allows you to adjust the vertical or horizontal space between columns or other content blocks. We recommend using this method instead of inserting empty text blocks or lines (by pressing Enter), as doing so can often cause unexpected design issues, especially on mobile devices.
Getting Started
To get started, you first need to log into the web builder through your Online Control Panel. Unsure how to do so? Follow our guide HERE
Step One
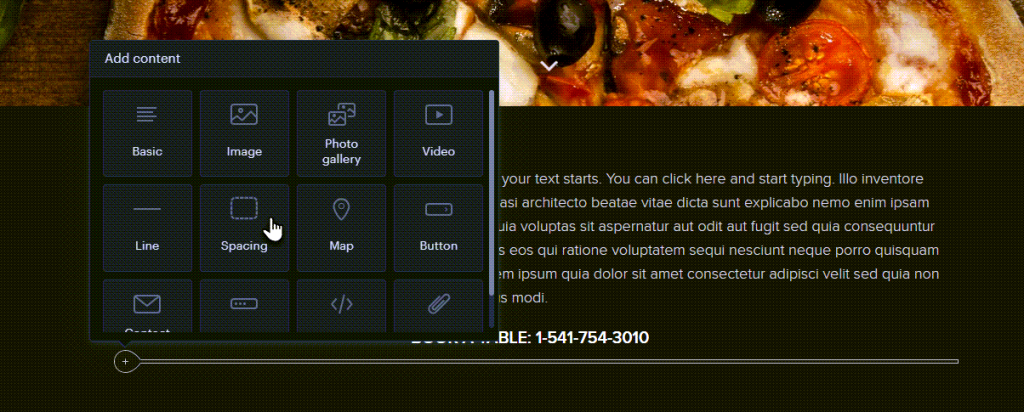
Position your mouse in the section so that the plus button for adding new content becomes visible.

Step Two
Click the plus button < Spacing.

Step Three
After selecting a spacing, you can configure the size or delete it by using the sliders.

Step Four
You can also freely move this spacing.

TIP: If the cursor is not positioned on the spacing or if you haven’t clicked on it directly, it will appear as an empty space between other content. This is how it is displayed by default in the published version.

The spacing is always automatically hidden in the mobile version of the website.

If you have any further questions, simply raise a support request from within your Online Control Panel or call us on 01 5255768. Our Support team are here to help and ready to assist you with your enquiry.
For assistance raising a support request please follow the following guide.

